
We’ve all been there. You’re working on a design, and you know the perfect font is somewhere on your computer. You just can’t find it. You spend ten minutes scrolling through a dropdown menu full of random names, hoping one sparks joy.
It drives me crazy.
For years, my font management system was a mess. I’d download a cool free font, forget to install it, or install it and forget where it went. That is, until I started using Fontlu. It’s honestly changed how I handle typefaces. In this post, I want to walk you through why Fontlu is a smarter way to manage and customize your fonts, and how it can save you from the dropdown menu nightmare.
The Problem: Why Finding Fonts Feels So Hard
If you’re a blogger, designer, or just someone who loves making things look nice, you probably have a font hoarding problem. (I know I do!) We see a great font on a site like Google Fonts or DaFont, download it, and then… nothing.
Here is the usual struggle:
-
The Black Hole: Fonts disappear into your system folder, never to be seen again.
-
The Guessing Game: You have to try each font one by one in your software just to see what it looks like.
-
The Overload: Your font menu in Word or Photoshop is a mile long, filled with typefaces you never use.
It kills creativity. You end up using the same safe fonts over and over because it’s too much work to experiment.
What is Fontlu? (And Why You Should Care)
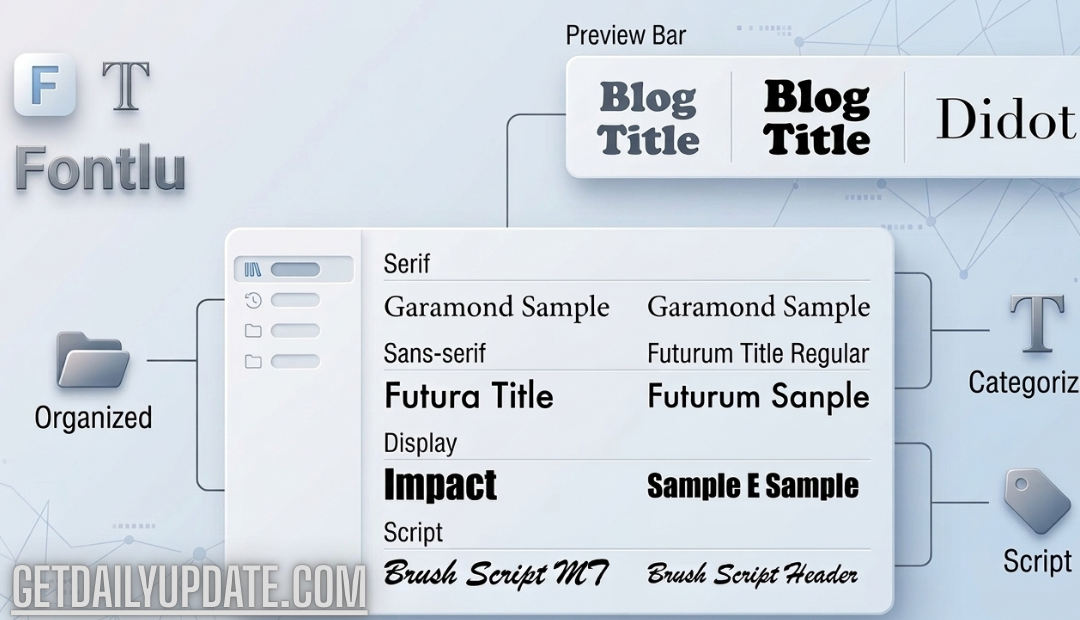
So, what exactly is Fontlu? Simply put, it’s a font manager. But it’s not just a library. It’s a tool that lets you actually see and organize your collection without having to install every single file into your operating system.
Think of it as your own personal font wardrobe. Instead of throwing all your clothes on the floor (your system folder), you hang them up neatly in a closet (Fontlu). You can see everything at a glance, pick an outfit, and only put it on when you need it.
It keeps your computer fast and your creative mind focused. For anyone serious about branding or design, having a tool like this isn’t a luxury; it’s a necessity.
How to Get Started with Fontlu in 3 Simple Steps
Getting started is ridiculously easy. If you can drag and drop a file, you can use this. Here’s the quick process I followed:
-
Download and Install: First, head to the Fontlu website and grab the app. The installation took me about sixty seconds.
-
Import Your Collection: This is the fun part. You simply drag your entire “Fonts” folder from your computer right into the Fontlu window. The app scans everything and generates previews instantly.
-
Start Organizing: Now you can see all your fonts. I started by creating a folder called “Blog Headers” and another called “Favorites.”
Once your fonts are in there, you can activate them with a single click. They appear in your software for that session, and you can turn them off just as easily to keep your system clean. It’s a game-changer.
Customizing Your View for Better Workflow
One of my favorite features is how customizable the preview pane is. You aren’t stuck looking at a boring list of names. You can type a sample word—like your own name or your blog’s name—to see exactly how the font looks in context.
For example, I typed “Sarah’s Kitchen” into the preview bar. Instantly, I could scroll through hundreds of fonts all showing my blog title. It took me about two minutes to find the perfect pairing for a food blog I was helping with. Without Fontlu, that would have taken an hour of installing, opening Word, typing, deleting, and repeating.
Real Examples: Using Fontlu for Branding
Let’s say you’re rebranding your website. You need a headline font and a body font that work well together.
In Fontlu, you can:
-
Create a Smart Set: Make a folder called “Rebranding Project.”
-
Drag and Drop: Pull every font you think you might want into that folder.
-
Compare Side-by-Side: Open the side panel and compare two typefaces directly. You can see instantly if your chosen script font is readable next to your sans-serif body font.
It turns a stressful decision into a fun, visual experience.
My Personal Take: Why I’m Never Going Back
I have to be honest with you. Before Fontlu, I used to just… not use fonts. I stuck to the system defaults because the hassle wasn’t worth it. I remember spending an entire afternoon trying to find the font I used on a business card I designed three years prior. It was miserable.
Since moving my library to Fontlu, that problem is gone. I actually look forward to picking type now. It feels like less of a chore and more like playing. I know that sounds cheesy, but when your tools work with you instead of against you, the whole vibe of your workday changes. It’s just one less thing to stress about.
Pro Tips for Managing Your Fonts Like a Pro
If you do decide to clean up your act (and I hope you do!), here are three tips to keep things tidy from the start:
-
Delete the Duds: Be brutal. If you downloaded a font in 2018 and have never used it, delete it from the app. You can always re-download it later.
-
Name Your Collections Clearly: Don’t use vague names like “Fonts1.” Use specific names like “Serif for Print” or “Client A – Drafts.”
-
Use the “Trial” Feature: Most font managers, including Fontlu, let you preview fonts without activating them. Use this feature 99% of the time. Only activate the one or two fonts you are actively working with.
Conclusion
Managing your fonts doesn’t have to be a headache. By using a dedicated tool like Fontlu, you can turn a messy folder of files into a curated, searchable library. It saves time, boosts creativity, and honestly makes designing a lot more fun.
I’d love to hear how you currently manage your fonts. Are you a “install everything” person, or are you already using a manager? Let me know in the comments below! And if you found this post helpful, please share it with a friend who needs to organize their font life.
If you want to read more information, visit


Leave a Reply